| section: < previous | next > |
| |
|
chapter: << previous | next >> |
3.4 Let - In expressions
Let - In expressions serve for assigning a complex VOCL expression to a
variable which can be used then. This expression is divided into two
parts: on the left hand side (the Let
part) you define the expression that should be assigned to a variable
and on the right hand side (the In
part) you can define arbitrary VOCL expression in which the variable
can be used.
The expression on left side must have a ClassifierRole /
SetClassifierRole which has the same rolename and roletype as the
Constraint context, so that a translation to a OCL-String can be done.
3.4.1 Creating Let - In expressions
The creation of these expressions is done in few steps:
- Select the entry Let-In-Expression in the editor palette.
- Move the cursor inside a Constraint and click the left mouse button.
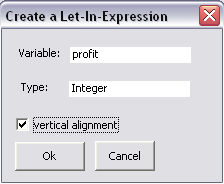
- A dialog (see Fig. 3.4.1) is opened in which you have to specify
a variable name, variable type and the alignment of the figure
(vertical / horizontal).
 |
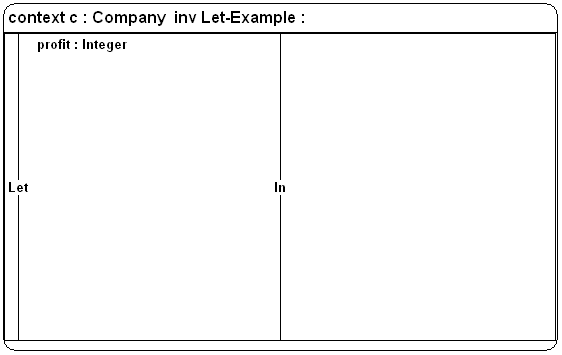
In Fig. 3.4.2 you can see the result in the editor. You see a figure which is divided into the Let and In part as mentioned above. In the left top corner the variable name and the variable type appear.
 |
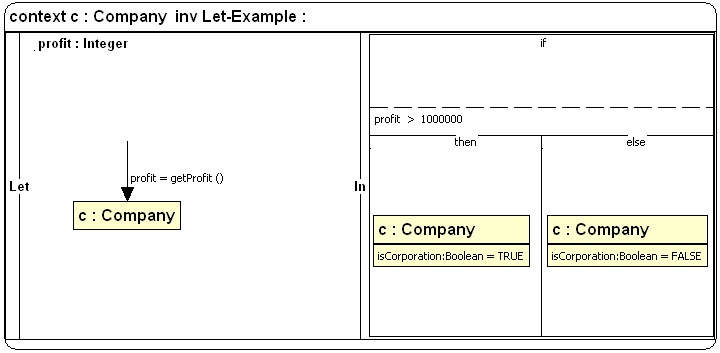
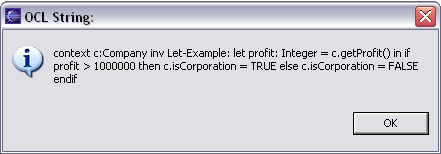
In Fig. 3.4.3 you can see a more complex example for Let - In expressions: On the left side there is a ClassifierRole with a method call getProfit() whose result is stored in the variable profit which belongs to the Let - In expression. Then, this variable is used on the right side in the if-then-else expression.
 |
 |
